This “How to Install ONAP on Kubernetes using Cloudify” tutorial covers the process required to install a Kubernetes cluster using the Cloudify orchestrator and installing ONAP atop the Kubernetes cluster using ONAP’s Operations Manager.
The Kubernetes cluster is configured atop OpenStack, and its presumed that OpenStack is already installed.
ONAP Software and Hardware Requirements:
For the Casablanca release, the hardware and software requirements are as follows:
| Software | Version |
| Kubernetes | 1.11.5 |
| Helm | 2.9.1 |
| kubectl | 1.11.5 |
| Docker | 17.03.x |
| Resource | Size |
| RAM | 224GB |
| HardDisk | 160GB |
| vCores | 112 |
The hardware resource requirements are for a full installation, so the requirements differ with components need to be installed.
Cloudify Manager Installation:
- Download the Centos7 Cloud image and upload it to OpenStack images.
The Centos image can be downloaded from: https://cloud.centos.org/centos/7/images/CentOS-7-x86_64-GenericCloud.qcow2
- Spawn an OpenStack instance with Centos7 image.
System prerequisites details can be found on the following page: https://docs.cloudify.co/4.6/install_maintain/installation/prerequisites/
- Install Cloudify Manager, with steps mentioned on page https://docs.cloudify.co/4.6/install_maintain/installation/installing-manager/
- Once the Cloudify Manger installation is complete, the Cloudify UI can be accessed, using http://<cloudify_manager_public_IP> with credentials mentioned in config file.
Setting Up Kubernetes Cluster with Cloudify:
- Login to the Cloudify manager machine and add the Cloudify secrets needed for setting up Kubernetes cluster:
$ cfy secrets create centos_core_image -s centos7_image

$ cfy secrets create large_image_flavor -s xlarge

$ cfy secrets create keystone_username -s openstackadmin

$ cfy secrets create keystone_password -s its_a_secret

$ cfy secrets create keystone_tenant_name -s onap

$ cfy secrets create keystone_url -s https://cloud.openstack.com:5000/v3

$ cfy secrets create region -s RegionOne

$ cfy secrets create agent_key_private -f secret.txt

$ cfy secrets create private_subnet_name -s onap_subnet

$ cfy secrets create private_network_name -s onap_network

$ cfy secrets create public_network_name -s external_network

$ cfy secrets create router_name -s onap_router
- Clone the ONAP OOM (ONAP Operations Manager) Casablanca branch on Cloudify manager:
$ git clone https://gerrit.onap.org/r/oom -b casablanca
- Update Software/Hardware stack if needed.
The existing Cloudify OpenStack blueprint creates a 7 node cluster. The number of nodes can be modified by updating the default_instances value:
vim /oom/TOSCA/kubernetes-cluster-TOSCA/openstack-blueprint.yaml

------

properties:

default_instances: 6
The software Stack installed on Kubernetes can be modified by updating the packages section:
$ vim oom/TOSCA/kubernetes-cluster-TOSCA/imports/cloud-config.yaml

-------

packages:
- [docker-engine, 17.03.0.ce-1.el7.centos]

- [kubelet, 1.11.5-0]

- [kubeadm, 1.11.5-0]

- [kubectl, 1.11.5-0]

- [kubernetes-cni, 0.6.0-0]
Once the all the required changes are done,
- Upload the blueprint to the Cloudify manager.
- Create a deployment with the blueprint uploaded.
- Execute install workflow on the deployment created.
$ cd oom/TOSCA/kubernetes-cluster-TOSCA

$ cfy blueprints upload -b onap_K8S openstack-blueprint.yaml

$ cfy deployments create –b onap_K8S onap_K8S_Dep

$ cfy exec start install –d onap_K8S_Dep
Upon successful installation, the K8S cluster will created. The details of this cluster can be retrieved using kubectl commands:
$ kubectl get nodes

NAME                                                       STATUS    ROLES     AGE       VERSION

server- centos7-k8sd2-kubernetes-master-host.novalocal     Ready     master    40d       v1.11.5

server- centos7 -k8sd2-kubernetes-node-host.novalocal     Ready     <none>    40d       v1.11.5

server- centos7 -k8sd2-kubernetes-node-host.novalocal     Ready     <none>    40d       v1.11.5

server- centos7 -k8sd2-kubernetes-node-host.novalocal     Ready     <none>    40d       v1.11.5

server- centos7 -k8sd2-kubernetes-node-host.novalocal     Ready     <none>    40d       v1.11.5

server- centos7 -k8sd2-kubernetes-node-host.novalocal     Ready     <none>    40d       v1.11.5

server- centos7 -k8sd2-kubernetes-node-host.novalocal     Ready     <none>    40d       v1.11.5
OpenStack environment variables (example: Tentant/Image/…), can be updated by logging to the cloudify UI: under System Resources/Secret Store Management/Update Secret.
Installation Pre-requisites:
Once the Kubernetes installation is complete, now we are ready to start the installation.
If the Kubernetes cluster has been installed with the above instructions, Helm installation and setting up NFS share can be skipped as Cloudify will setup both of these. If any existing Kubernetes cluster is being used, then follow all instructions.
Helm Installation on Kubernetes master:
Helm is used by the OOM for package and configuration management.
Helm is the package manager for Kubernetes, which helps in managing Kubernetes applications:
$ wget http://storage.googleapis.com/kubernetes-helm/helm-v2.9.1-linux-amd64.tar.gz

$ tar -zxvf helm-v2.9.1-linux-amd64.tar.gz

$ sudo mv linux-amd64/helm /usr/bin/helm
With this helm client is installed, execute the following commands to setup the Helm server:
$ kubectl -n kube-system create sa tiller

$ kubectl create clusterrolebinding tiller --clusterrole cluster-admin --serviceaccount=kube-system:tiller

$ helm init --service-account tiller
Verify the Helm installation
$ helm version

Client: &version.Version{SemVer:"v2.9.1", GitCommit:"20adb27c7c5868466912eebdf6664e7390ebe710", GitTreeState:"clean"}

Server: &version.Version{SemVer:"v2.9.1", GitCommit:"20adb27c7c5868466912eebdf6664e7390ebe710", GitTreeState:"clean"}
Setting UP Shared NFS storage across worker nodes:
OOM currently requires that all kubelets mount a shared NFS directory for data storage, so pods across the worker nodes can read the config and config data which is persistent across the node reboots.
NFS on Kubernetes master Node
$cat /etc/exports

/dockerdata-nfs *(rw,no_root_squash,no_subtree_check)
On all worker nodes of the Kubernetes cluster, mount the above NFS directory by making entry in /etc/fstab.
Mounting NFS on worker Node
$ cat /etc/fstab

192.168.0.1:/dockerdata-nfs /dockerdata-nfs nfs auto 0 0

$ mount -a
Generate Openstack Encrypted Password:
$oom/kubernetes/so/resources/config/mso# echo -n "" | openssl aes-128-ecb -e -K `cat encryption.key` -nosalt | xxd -c 256 -p
ONAP Installation:
ONAP is using OOM as the preferred and recommended way to install ONAP. OOM is a set of Helm charts for Kubernetes, which deploys and manages ONAP.
Helm charts are hosted locally, execute the following commands to start local helm server and add local repo:
$ helm init

$ helm serve &

$ helm repo add local http://127.0.0.1:8879

$ helm repo list
Clone the OOM code from required branch:
git clone -b casablanca http://gerrit.onap.org/r/oom
ONAP has individual helm charts for all its components. There is a parent chart called ONAP which is used when changes across all components is needed. Update the values.yaml at oom/kubernetes/onap, sample updated values are:
# image pull policy pullPolicy: IfNotPresent

so:

enabled: true

replicaCount: 1

liveness:

# necessary to disable  liveness probe when setting breakpoints

# in debugger so K8s  doesn't restart unresponsive container

enabled: true

# so server configuration config:

# message router  configuration

dmaapTopic:  "AUTO"

# openstack configuration

openStackUserName:  " openstackadmin "

openStackRegion:  "RegionOne"

openStackKeyStoneUrl:  "https://cloud.openstack.com:5000/v3 "

openStackServiceTenantName:  " onap "

openStackEncryptedPasswordHere:  "d05c5a37ab7af6dc52f3660bf20053a1"
Update oom/kubernetes/robot/values.yaml with VIM (OpenStack) details, robot scripts will be useful to demonstrate the demos(ex: vFW demo).
Execute make command to prepare and save helm charts:
$ cd oom/kubernetes

$ make all

1 chart(s) linted, no failures

Successfully packaged chart and saved it
Listing Helm Repository
$ helm search -l

NAME                            CHART VERSION   APP VERSION     DESCRIPTION

local/aaf                       3.0.0               ONAP Application Authorization Framework

local/aai                       3.0.0               ONAP Active and Available Inventory

local/appc                      3.0.0               Application Controller

local/cassandra                 3.0.0               ONAP cassandra

local/clamp                     3.0.0               ONAP Clamp

local/cli                       3.0.0               ONAP Command Line Interface

local/common                    3.0.0               Common templates for inclusion in other charts

local/consul                    3.0.0               ONAP Consul Agent

local/contrib                   3.0.0               ONAP optional tools

local/controller-blueprints     3.0.0               Controller Blueprints Micro Service

local/dcaegen2                  3.0.0               ONAP DCAE Gen2

local/dgbuilder                 3.0.0               D.G. Builder application

local/dmaap                     3.0.0               ONAP DMaaP components

local/esr                       3.0.0               ONAP External System Register

local/log                       3.0.0               ONAP Logging ElasticStack

local/mariadb-galera            3.0.0               Chart for MariaDB Galera cluster

local/mongo                     3.0.0               MongoDB Server

local/msb                       3.0.0               ONAP MicroServices Bus

local/multicloud                3.0.0               ONAP multicloud broker

local/music                     3.0.0               MUSIC - Multi-site State Coordination Service

local/mysql                     3.0.0               MySQL Server

local/nbi                       3.0.0               ONAP Northbound Interface

local/network-name-gen          3.0.0               Name Generation Micro Service

local/onap                      3.0.0           Casablanca      Open Network Automation Platform (ONAP)
The setup of the Helm repository is a one-time activity. In case changes are needed, update the values.yaml and re-run ‘make all’.
Once the make command succeeds, we are ready to deploy ONAP. ONAP installation is completed with master helm chart ONAP, which will install all the selected ONAP components.
Start the ONAP installation with command:
helm install local/onap --name onap --namespace onap
The first time installation will take couple of hours, as lot of images need to be downloaded from the Internet.
Checking the status of Installation and Verify
Check the status of the ONAP installation with kubectl get pods commands, check all pods in Running/Completed state:
$ kubectl get pods -n onap

NAME READY STATUS RESTARTS AGE

dep-config-binding-service-7b68dfd444-6nwlk 2/2 Running 0 11d

dep-dcae-datafile-collector-b67b74598-b7qmx 2/2 Running 0 11d

dep-dcae-hv-ves-collector-6b4bf7f5db-z9s7f 2/2 Running 0 11d

dep-dcae-prh-78b579db5f-zbkf9 2/2 Running 0 11d

dep-dcae-snmptrap-collector-6455574cc4-9xf44 1/1 Running 0 11d

dep-dcae-tca-analytics-84f56d4cbc-db76r 2/2 Running 1 11d

dep-dcae-ves-collector-6c87c689cf-z7b5r 2/2 Running 0 11d

dep-deployment-handler-6644fc65b9-q69px 2/2 Running 0 11d

dep-inventory-9d66fbfd-s4kfv 1/1 Running 0 11d

dep-policy-handler-8944dd474-kncpg 2/2 Running 0 11d

dep-pstg-write-77c89cb8c4-mgd62 1/1 Running 0 11d

dep-service-change-handler-7b544f558d-gktk9 1/1 Running 0 11d

onap-aaf-cm-9545c9f77-v2nsq 1/1 Running 0 11d

onap-aaf-cs-84cbf5d4ff-x86mz 1/1 Running 0 11d

onap-aaf-fs-65ccb9db74-5cpzm 1/1 Running 0 11d

onap-aaf-gui-7c696c4cb6-lfkv4 1/1 Running 0 11d

onap-aaf-hello-747fbc7bc7-g98cs 1/1 Running 0 11d

onap-aaf-locate-788d8d7f6d-tmk2v 1/1 Running 0 11d
Executing Basic Robot tests
Execute the oom/kubernetes/robot/ete-k8s.sh script to test the basic functionality of the ONAP deployment:
[centos@k8s-master1 robot]$ ./ete-k8s.sh onap health

Executing robot tests at log level TRACE

==============================================================================

Testsuites

==============================================================================

Testsuites.Health-Check :: Testing ecomp components are available via calls.

==============================================================================

Basic A&AI Health Check | PASS |

------------------------------------------------------------------------------

Basic AAF Health Check | PASS |

------------------------------------------------------------------------------

Basic AAF SMS Health Check | PASS |

------------------------------------------------------------------------------

Basic APPC Health Check | PASS |

------------------------------------------------------------------------------

Basic CLI Health Check | PASS |

------------------------------------------------------------------------------

Basic CLAMP Health Check | PASS |

------------------------------------------------------------------------------

Basic DCAE Health Check | PASS |

------------------------------------------------------------------------------

Basic DMAAP Data Router Health Check | PASS |

------------------------------------------------------------------------------
Accessing the ONAP portal
From the machine where the portal need to be accessed, the etc/hosts file need to be updated with component name and host IP where pod is hosted.
Sample /etc/hosts as follows:
192.168.127.151 portal.api.simpledemo.onap.org

192.168.127.153 vid.api.simpledemo.onap.org

192.168.127.154 sdc.api.fe.simpledemo.onap.org

192.168.127.154 portal-sdk.simpledemo.onap.org

192.168.127.151 policy.api.simpledemo.onap.org

192.168.127.151 aai.api.sparky.simpledemo.onap.org

192.168.127.153 cli.api.simpledemo.onap.org

192.168.127.153 msb.api.discovery.simpledemo.onap.org
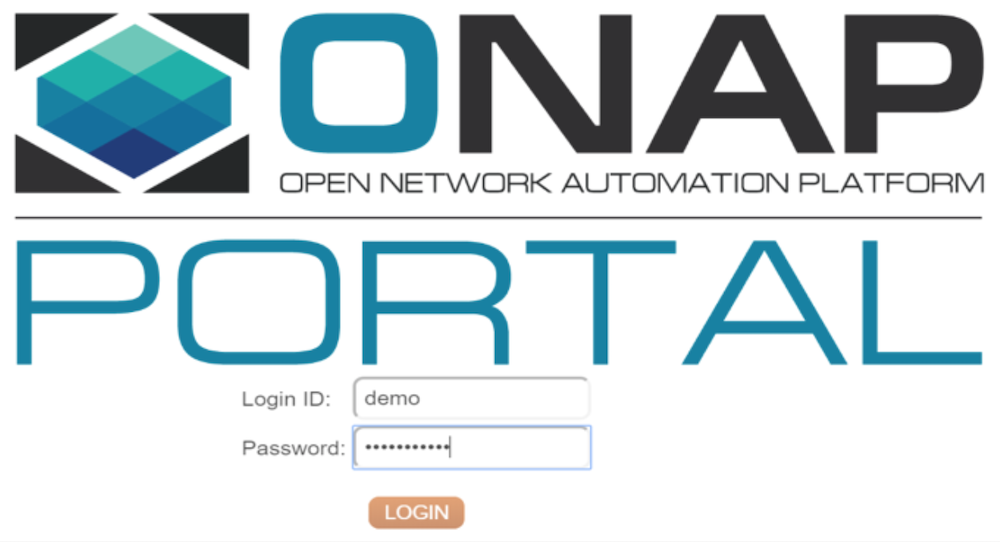
Access the ONAP portal with: https://portal.api.simpledemo.onap.org:30225/ONAPPORTAL/login.htm using the user credentials:
Username: demo
Password: demo123456!
That’s it! You’ve now installed ONAP on Kubernetes using Cloudify. If you get stuck with this, check out our training courses to learn more about technologies including Kubernetes, as well as a range of Open Networking techniques. Alternatively, contact our Solutionauts for help.